Raspberry Pi desktops for little kids
I built two little desktop computers from Raspberry Pi boards and some spare peripherals for my (quite small) children to learn to use a keyboard and mouse. Kids seem to get most computer interaction from an iPad or other simplified device now - a fact I learned by seeing them start by holding the mouse backwards! Our kids have a tablet too, but the practice of using a keyboard and mouse and other general-purpose computer tasks is worthwhile. Maybe they’ll even practice some letters and numbers and draw some art … once they can get control of the mouse.
I chose not to use the sort of desktop environments that look very “iPad-like” with super simple UIs and locked down everything. I had to memorize a few DOS commands as a kid to play some games, then figure out the early Windows UI. Accidentally breaking things, learning to deal with frustration, and (much later) figuring out how to fix it are all good things for them to learn. Apart from breaking the hardware, there’s nothing they can do that I can’t undo with a quick re-image.
Hardware
These were a mix of parts I already had on hand and stuff we purchased. You’ll need:
- Raspberry Pi 4 or 5 (amount of RAM up to you)
- Micro-SD card (capacity up to you)
- Power supply for the board (15W USB-C)
- Case (strongly recommend a passively cooled case like this one , as kids + moving parts = 🤮)
- Keyboard and mouse (I used cheap USB ones or random spares)
- Bluetooth headset or speakers
- Monitor (if it’s an older one, probably an adapter or two to get to micro-HDMI)
I’d initially used some earlier generation Raspberry Pi B boards, but found that they were a touch too slow for some of the games and caused a lot of frustration. Moving to the faster processor in the newer board resolved this.
Initial setup
On initial boot, I did the basics of joining it to the wifi, expanding the SD storage partitions, and setting up the initial user account to automatically log in at boot. Once that’s done, update and install the kid games.
1
2
3
4

sudo apt update
sudo apt dist-upgrade -y # upgrade everything first
sudo apt install gcompris-qt klettres tuxpaint tuxmath tuxtype -y
sudo reboot
The games seem appropriate for the elementary school and younger set, all linked below:
- gcompris , a suite of educational games
- klettres , alphabet and phonics practice
- tuxpaint , the legendary drawing program
- tuxmath , arithmetics practice
-
tuxtypefor touch-typing practice (no website?)
Tips and tricks
First, little ones don’t have great control of the mouse, so making all the icons and text bigger helps them use the machine more independently. I followed the Raspberry Pi tutorial here to change the taskbar icons to 48x48 px and the fonts to 15 points. Those two settings seemed to be enough of an improvement, but there’s an amazing ecosystem of accessibility settings in Linux to explore if it’s not enough for you.
The drawing app tuxpaint always launches in a window. This causes a ton of kiddo frustration, as they don’t quite understand the idea of multi-tasking yet. To launch it in full screen, create (or edit) ~/.tuxpaintrc to include:
1

fullscreen=yes
Lastly, the keyboards I used have power buttons on it. While this is fine for grown ups, disabling them prevents a lot of headaches. Edit /etc/systemd/logind.conf and add/edit the following lines:
1
2
3
4

HandlePowerKey=ignore
HandleSuspendKey=ignore
HandleHibernateKey=ignore
HandleRebootKey=ignore
Updating automatically
I’d started by doing things the way I always had - enabling SSH on each computer, then adding my keys for management manually, then adding some guardrails on SSH access. Then adding a static IP address to remember where things are and … and … and … I’m simply not that mad at running servers at home, so I tried a smaller-scale and maybe silly solution - just use GitHub Actions. It works well enough. 🤷♀️
Each Raspberry Pi is also a self-hosted runner, joined to a repository here . For reasons outlined in the documentation , this should be a private repository instead. As there’s nothing sensitive and all PR workflows are disabled, I feel comfortable with this repository being public for others to copy from.
After you create a new repo (if needed), join the Raspberry Pi to it as a self-hosted runner (directions ). Give it a label that describes it - in my case, kid-pi-1 and kid-pi-2. Here’s the workflow files (link ) to add to ~/.github/workflows/ to update all the packages, reboot, and verify it comes back online automatically once a week.
Later on, I will add the ability to open an issue and ping me if anything fails to come back up, as well as some rudimentary configuration management. I’ll write more about what and why and how later on. 😊
But does it work?
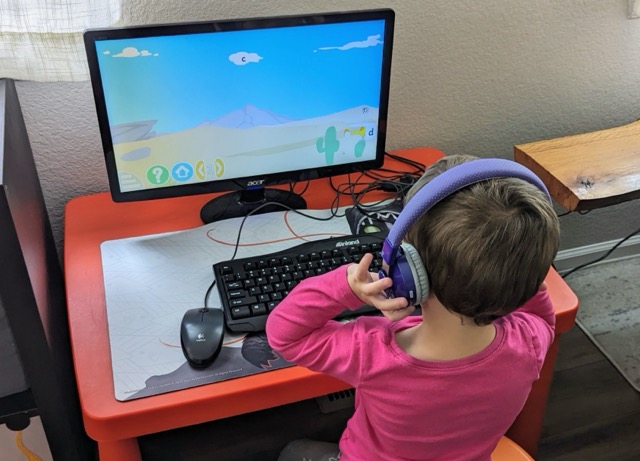
The kids love the simpler gcompris games and tuxpaint - that’s all I could ask for! 💝