Signing artifacts, attesting builds, and why you should do both
One of the most misunderstood parts of software supply chain security is the difference between signing and attesting. It’s both getting more attention lately and with it, a lot more vendor FUD. This topic was cut from my talk on code audits earlier this year, I thought I’d take a moment to explain the difference between the two, what questions they answer in an audit, and why you should care.
We’ll go through this using one of my small open-source projects as an example to follow along.
This means that you’ll be able to
- 🔗 Associate the end product (an image, tarball, executable, etc.) with the specific commit in Git.
- 🪪 Verify that the artifact was built by a specific CI run and any inputs associated with it.
- 🕵🏻♀️ Ensure it hasn’t been tampered with after the build.
The finished workflow for the impatient. 🥳
For this example, we’ll use Sigstore and GitHub, both on the open internet. To self-host all of this, you’ll need to run all of this infrastructure yourself. It’s not impossible and perhaps I’ll walk through that in a future post, but the steps aren’t materially different either.
A food analogy
Truth is, quite a lot of software, even some of the most popular projects, are much more like The Jungle by Upton Sinclair1 than the lovely pastural scene in food marketing.
An artifact signature is like the tamper-evident sticker on your to-go order. It’s more than likely that no one’s messed with your food since it left the kitchen it was packed in so long as that packaging is intact.
A build attestation is like the “organic” or “nut-free facility” or religious certification on your food. It’s a promise that the food was made in a certain way, with/without certain ingredients, and under certain conditions. The terms of that promise vary by the standard chosen.
The threat model of your software supply chain is similar to a Hazard Analysis and Critical Control Points (HACCP) plan. In food safety, it’s a document that formally identifies and controls hazards in the food production process. The plan also talks through mitigation of hazards, acceptable ranges for parameters (temperature, bacteria count, etc). It’s how companies and regulators dedicate limited time for maintenance, hygiene, and safety to the processes of manufacturing food.
From the “tech practicioner” point of view, the most common threat model to software supply chains are outlined by Supply-chain Levels for Software Artifacts , usually abbreviated to SLSA and pronounced “salsa” … and I swear that’s the end of the food analogies. 🌶️

Who cares?
Apart from the intrinsic value of software integrity … you know, the “I” of the CIA triad … there are a few compliance standards that care about this if you need a bit more prodding.
MITRE ATT&CK
A compromise of any of the points highlighted in the diagram above specifically map to one of the following techniques for Initial Access to a target:
- T1195.001 - Supply Chain Compromise: Compromise Software Dependencies and Development Tools
- T1195.002 - Supply Chain Compromise: Compromise Software Supply Chain
NIST, FedRAMP, and CMMC
There’s a few places in NIST standards that call out parts and pieces of this, but the most direct references are in the following:
- Secure Software Development Framework (SSDF) (NIST SP 800-218 ) calls out parts under PW.4 for reusing existing well-secured software where possible and PS.3 to archive and protect each software release.
- NIST SP 800-53 (and derivatives 800-171 and 800-172) specifically call out parts of this under
SI-7: Software, Firmware, and Information Integrity(link ) andCM-14: Signed Components(link ). While how these may be practiced differ on the baseline of the organization, checking that you’re installing what you think you are and it hasn’t been tampered with is always important. - I probably missed a few more, but these are the ones I see.
Sign for all!
Alright, so let’s break this down into two parts - signing and attesting.
Signing happens at the very end of the build process. It’s simpler to implement because it isn’t reliant on any other part of the build. It also makes no guarantees about what’s inside of that build, only that it hasn’t been tampered with once complete. We’ll sign our image after it has finished building, but before it gets pushed to the registry.
Signing it
Let’s do it first - it’s a simple addition to our container build to install cosign and use the existing JIT authentication token from GitHub Actions to sign each digest and tag we built. This workflow builds both an x86_64 and an arm64 image at the same time, so both need a signature. Add the following to the end of our workflow and … that’s it.
1
2
3
4
5
6
7
8
9
10
11
12
13

      - name: Install cosign
        uses: sigstore/cosign-installer@main

      - name: Sign the images with GitHub OIDC Token
        env:
          DIGEST: ${{ steps.build-and-push.outputs.digest }}
          TAGS: ${{ steps.docker_meta.outputs.tags }}
        run: |
          images=""
          for tag in ${TAGS}; do
            images+="${tag}@${DIGEST} "
          done
          cosign sign --yes ${images}
No really … that’s all we have to do. The signature is stored in the registry with the image, making it easy to retrieve later for verification.
For GitHub (and perhaps other registries), this appears somewhat confusingly as the sha256-WhateverTheDigestOfTheImageIs.sig file. It’s a simple OCI artifact, so many other tools can interact with it as well.
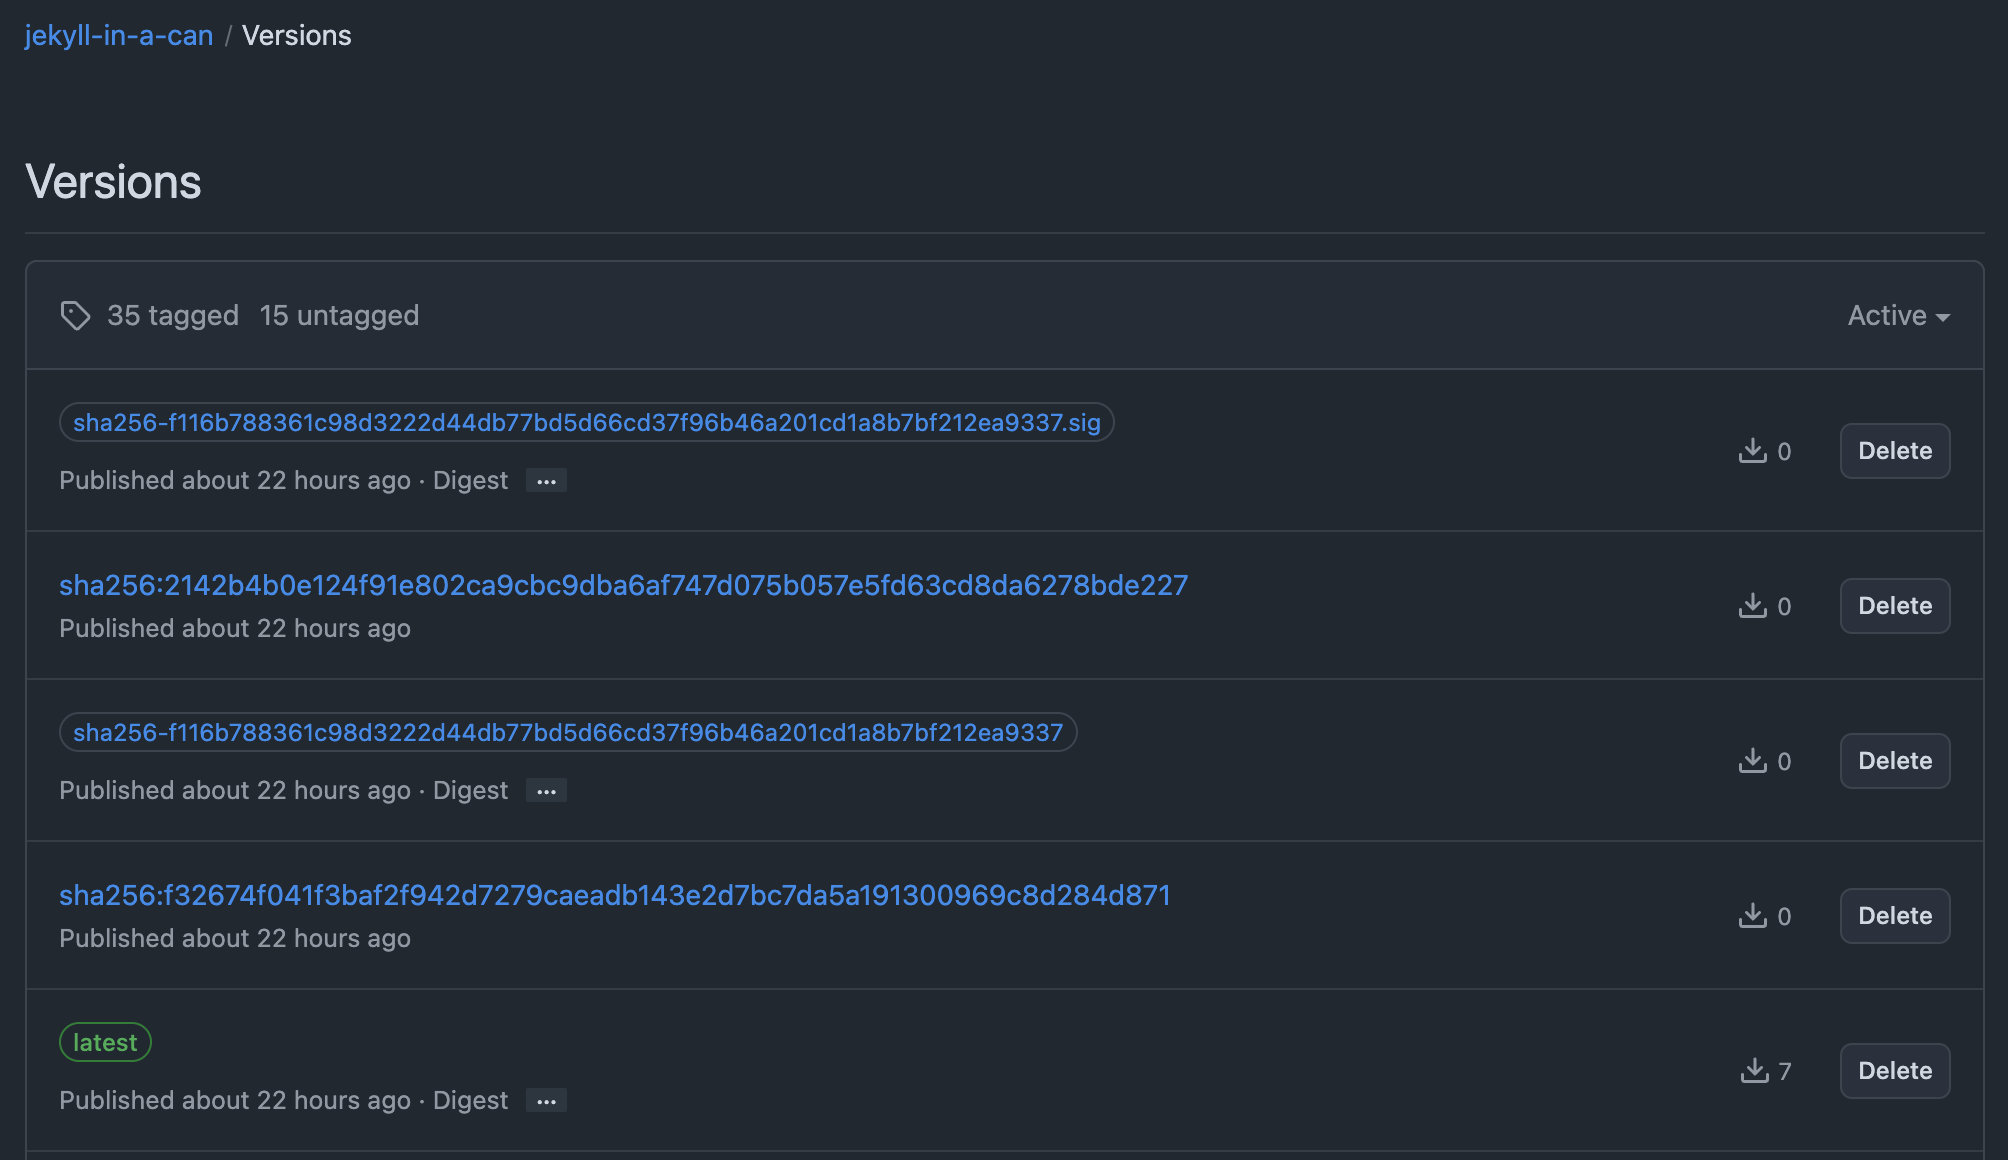
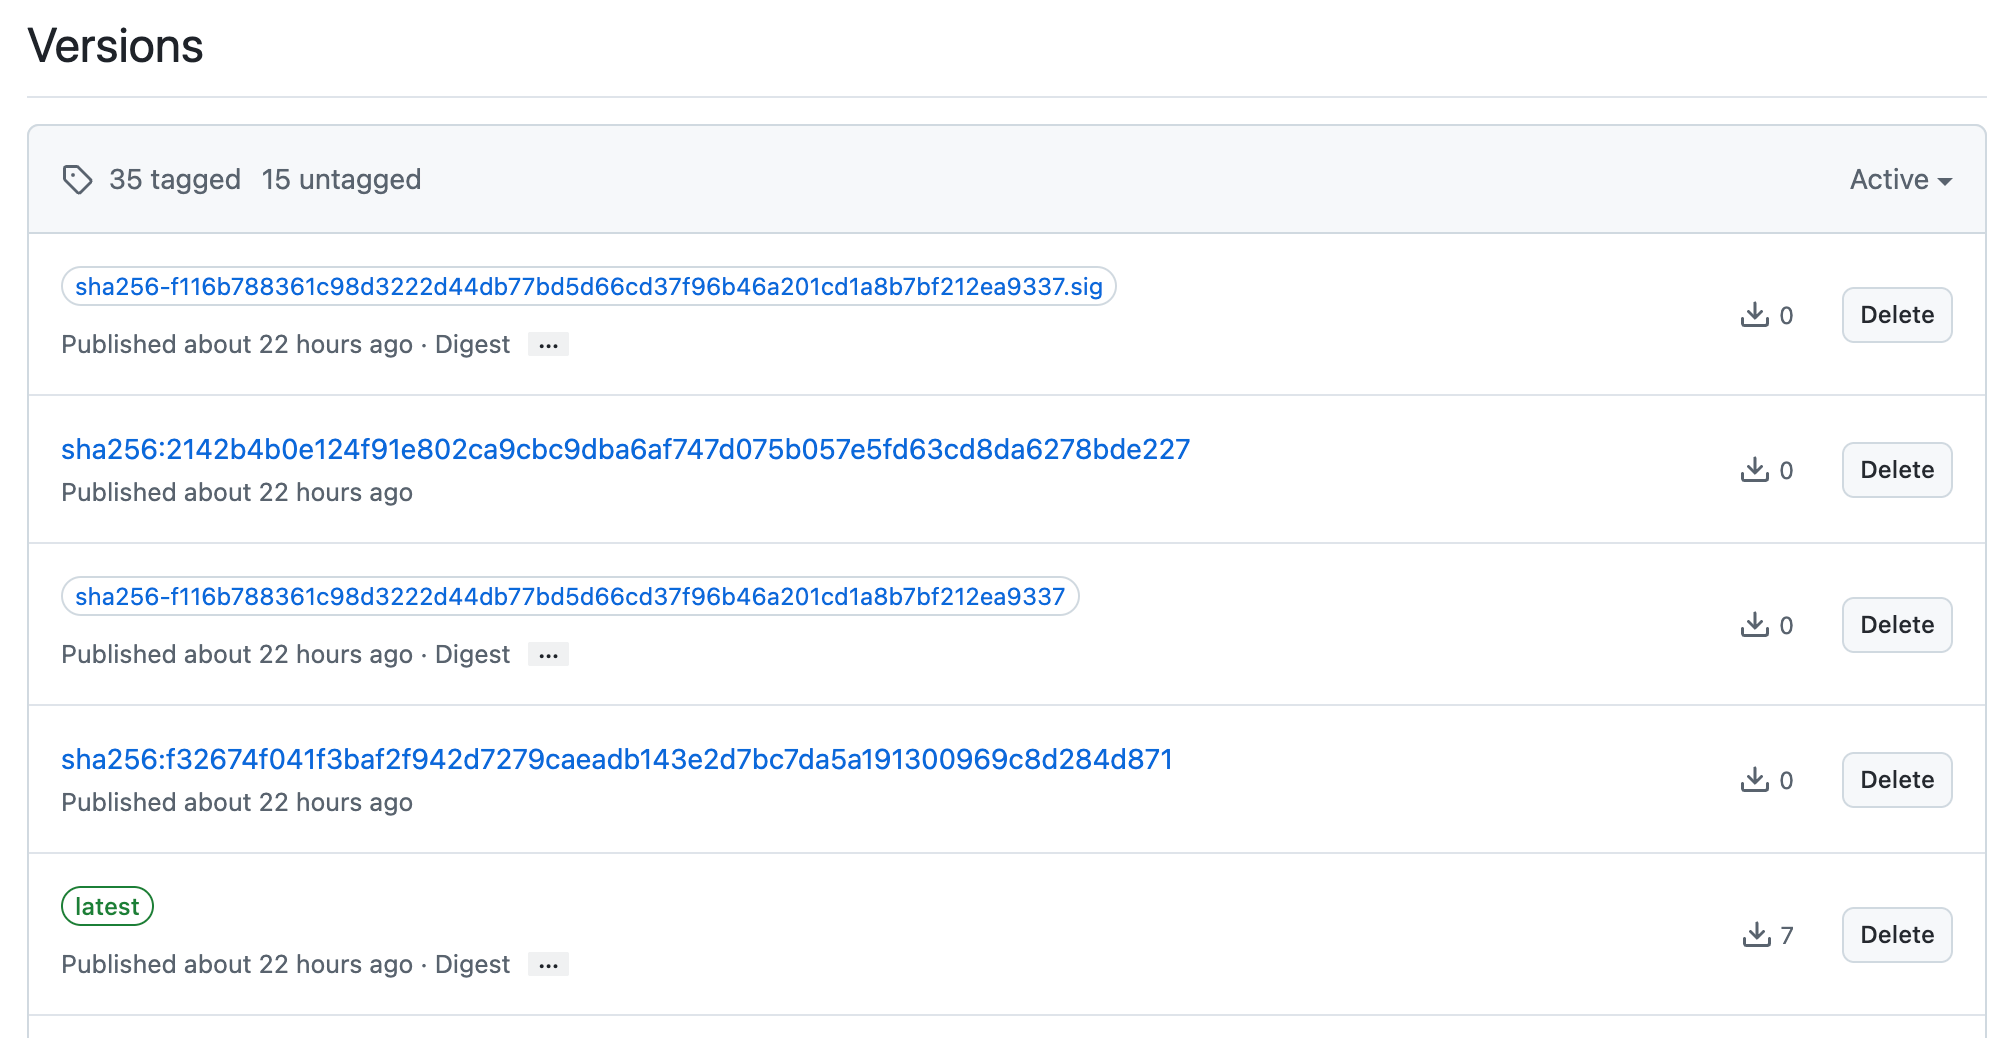 the signature stored alongside the image in the registry, named for the artifact digest it signed
If you click into that artifact, you’ll see it’s still a plain manifest file that contains the hash of the Rekor log entry . That should return the same public key bundled below when we dig into what’s in that signature file.
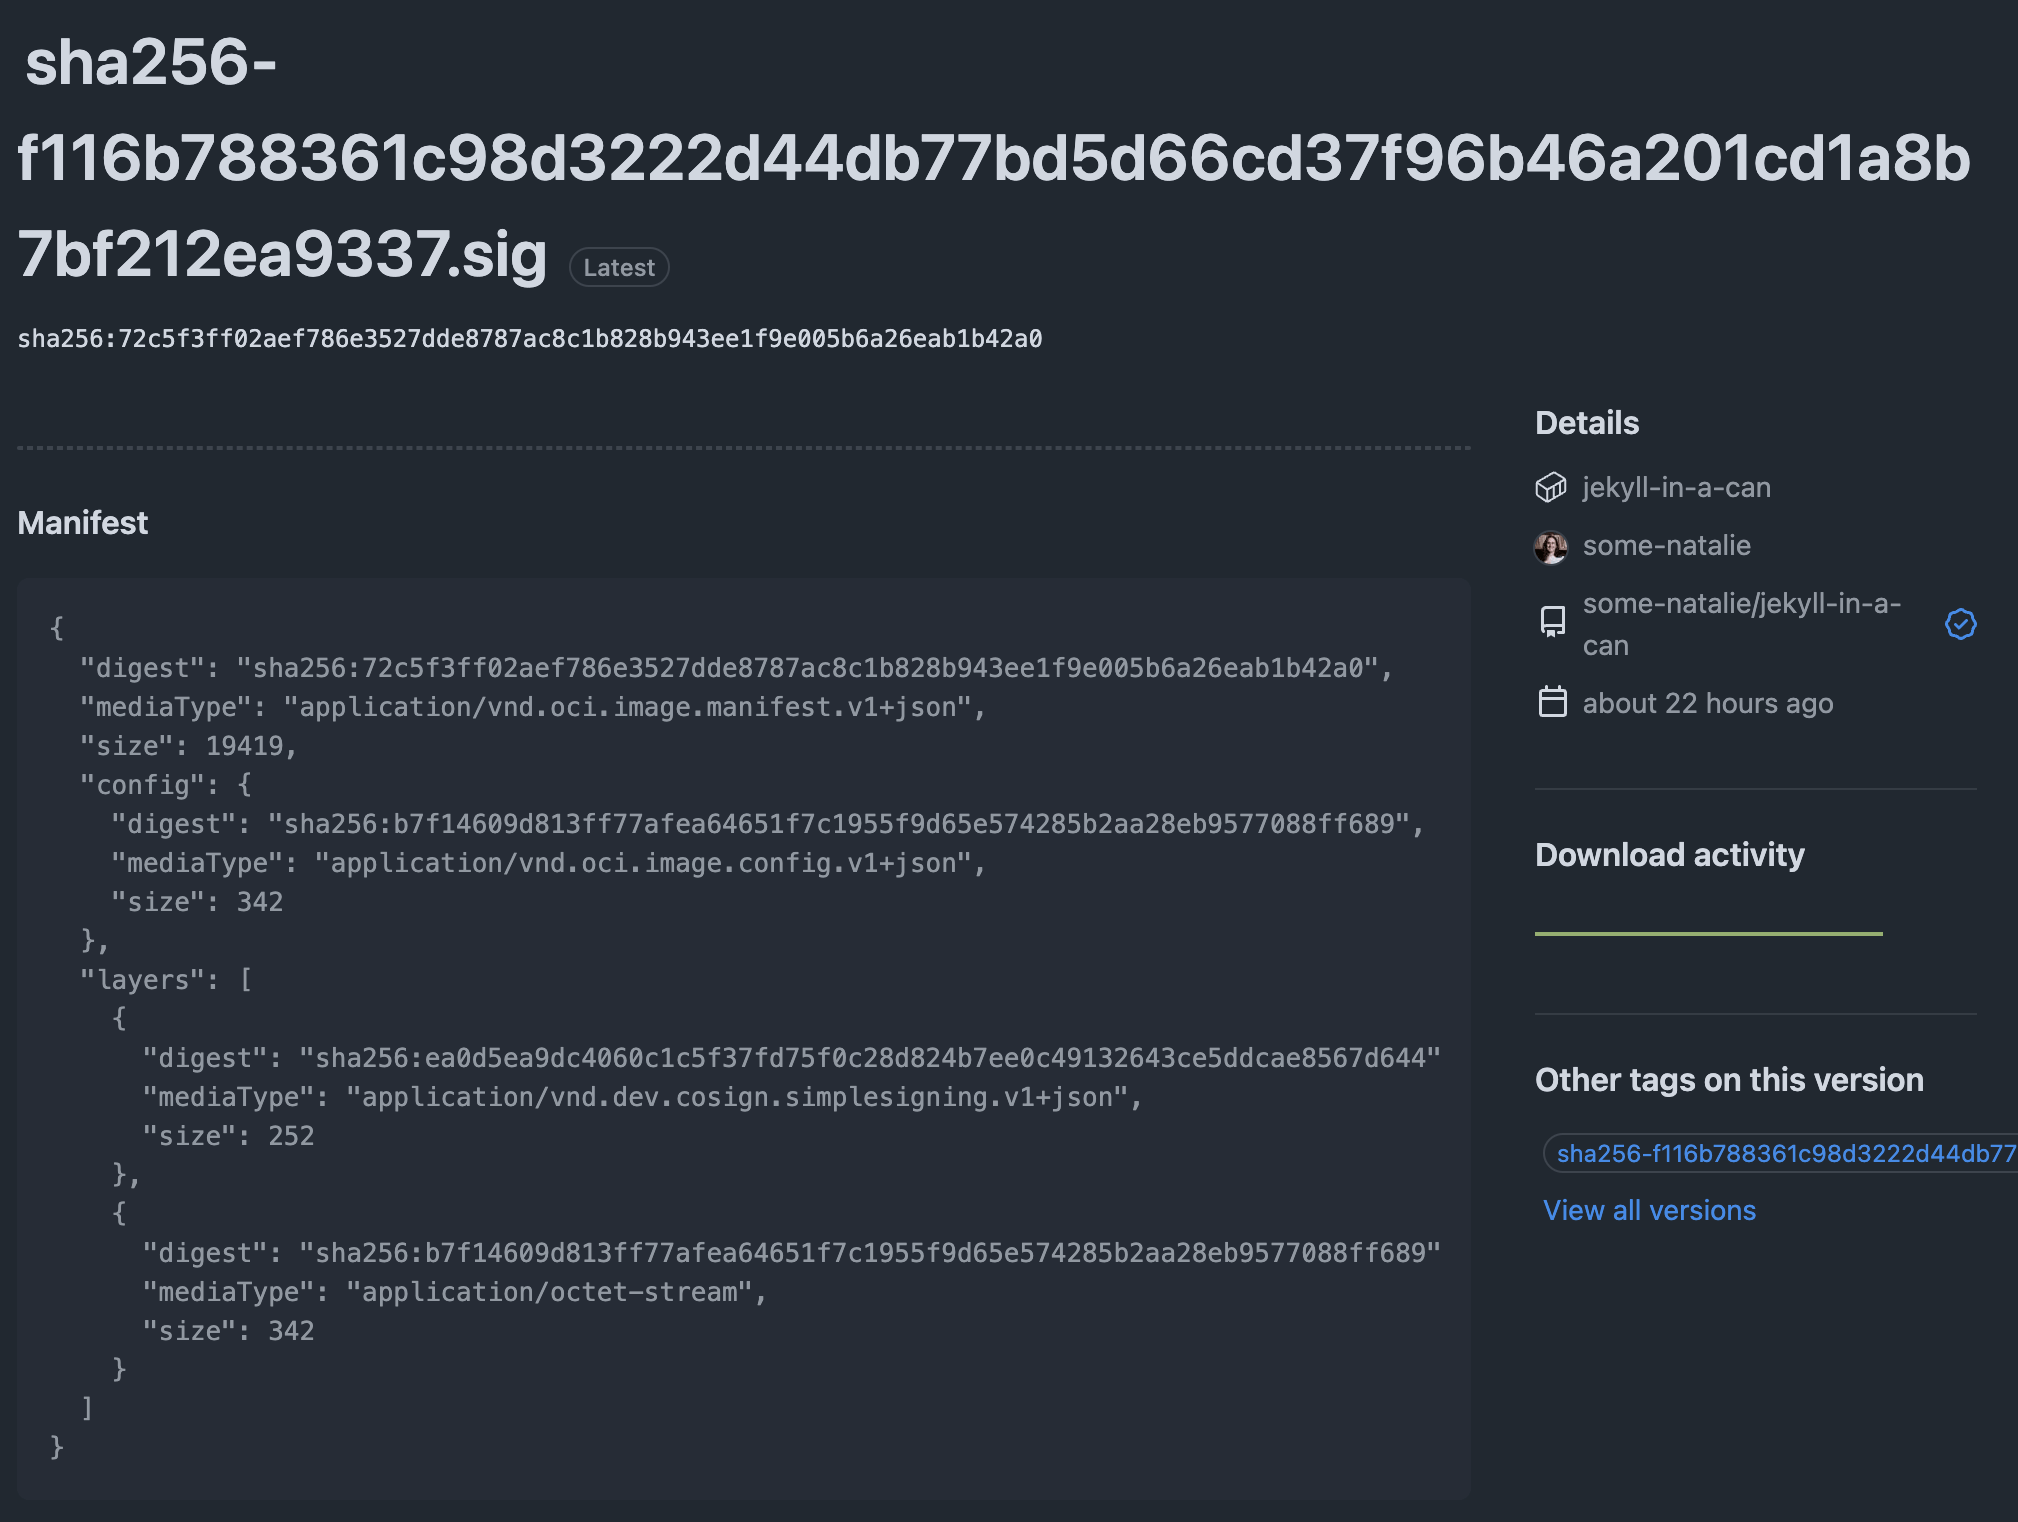
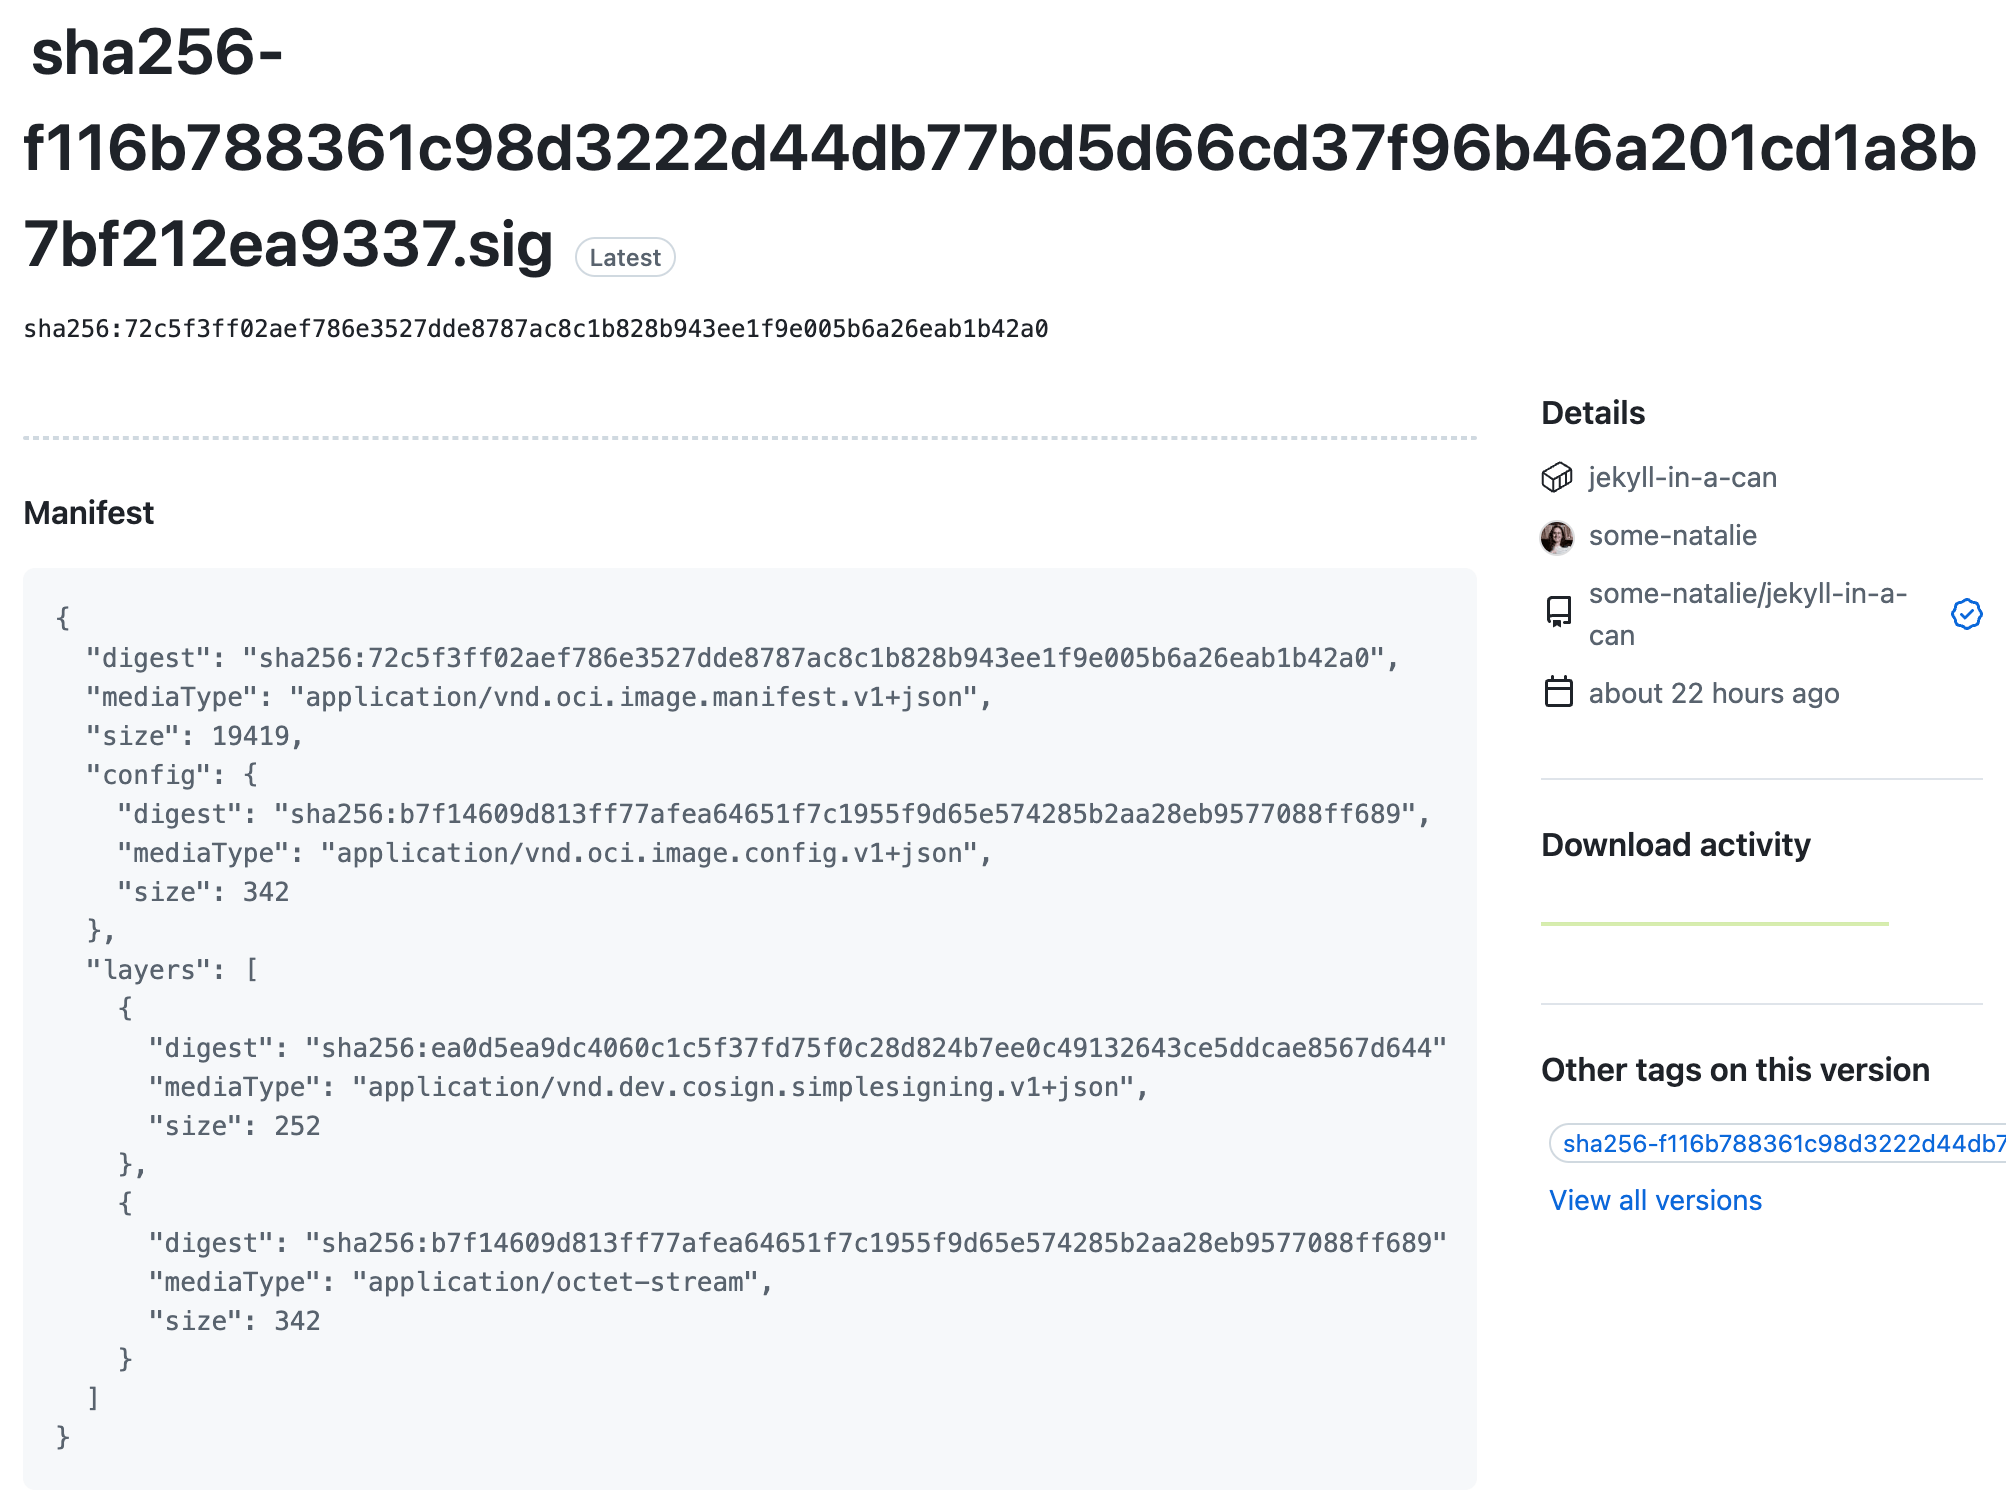 notice that
 digest in each layer … you’ll see it again soon if all is well
Using that signature
There are lots of ways we can use this signature. At the very basic level, you can verify it using a CLI command below.
1
2
3
4
5
6
7
8
9
10

ᐅ cosign verify \
      --certificate-oidc-issuer=https://token.actions.githubusercontent.com \
      --certificate-identity=https://github.com/some-natalie/jekyll-in-a-can/.github/workflows/build.yml@refs/heads/main \
      ghcr.io/some-natalie/jekyll-in-a-can:latest

Verification for ghcr.io/some-natalie/jekyll-in-a-can:latest --
The following checks were performed on each of these signatures:
  - The cosign claims were validated
  - Existence of the claims in the transparency log was verified offline
  - The code-signing certificate was verified using trusted certificate authority certificates
You can do lots of things with this data!
The command above returns meaningful exit codes, making it easy to build automation around it. This makes determining failure or success super simple, as well as providing the basis to segregate trust between environments. Additionally, the non-zero exit codes can be used to trigger alerts or other actions based on the meaning of each one. I see this most frequently in a “low to high ingestion” pipeline, where images are pulled and vetted on a lower-security environment (with access to the internet), then promoted into a more trusted enclave.
If everyone is staying on networks with access to the internet, it can be used with Sigstore’s admission controller to ensure that only signed images are deployed to your cluster. It’s possible, but more complicated, to entirely self-host this setup too.
What’s in that signature
The command above also returns a rather large JSON object (example ), if there’s an inclination to parse it yourself or write programs around it. Keys of interest in that JSON include fields that specify
- the workflow used in the build (the build directions)
- git commit (the exact version of the build directions)
- workflow trigger (why was this run?)
Even more on those in the docs .
There’s also quite a lot of base64 encoded data from the signature authority in that JSON (example ), allowing you to build automation around verifying the signature was valid at the time it was signed, who issued it, and the public key associated with it. Note how it corresponds to the digest in the manifest file above.
This is what allows you to definitively link the artifact to … something. In our case, it’s the code and build instructions in the repository. But what about what went on inside of that build? What tools were used? Where was that build taking place? This is where we add an attestation.
Attesting
Now we need to figure out a bit more about how our artifact was built - think information like tying it to a build log, the CI system used, what nodes picked up that job, and much more about what went on during that process.
First, we have a choice due to how this standard is implemented a bit differently on GitHub versus without. We can either
- Use
cosignto verify the attestation independently. - Stay in GitHub’s ecosystem and use
ghto verify the attestation as a big blob file.
We get the same information about our build tooling either way, but how it’s presented and stored is a bit different based on the tooling. For the purposes of a code audit, this gives me a bit more information such as:
- A link to the run number and logs of the build, which I can then archive or forward programmatically (stored here for example)
- A note on what sort of CI system was used to build this image (in this case, hosted runners on GitHub)
- Flexibility to add more build data if needed, but only to add it during the build so as not to be tampered with later
Cosign only
Taking a look at this without the gh CLI, the verification process is still pretty simple. The cosign docs are pretty helpful here. Since this was still built within GitHub, the OIDC issuer remains the same as above. It would be different for self-hosting.
1
2
3
4
5
6
7
8
9
10
11
12
13
14
15
16
17
18
19

ᐅ cosign verify-attestation \
  --type https://spdx.dev/Document \
  --certificate-oidc-issuer=https://token.actions.githubusercontent.com \
  --certificate-identity=https://github.com/chainguard-images/images/.github/workflows/release.yaml@refs/heads/main \
  cgr.dev/chainguard/wolfi-base
Opening browser to https://issuer.enforce.dev/oauth?audience=cgr.dev&client_id=auth0&create_refresh_token=true&exit=redirect&redirect=http%3A%2F%2Flocalhost%3A55344%2Fcallback%3Ftoken%3Dtrue&skip_registration=true

Verification for cgr.dev/chainguard/wolfi-base --
The following checks were performed on each of these signatures:
  - The cosign claims were validated
  - Existence of the claims in the transparency log was verified offline
  - The code-signing certificate was verified using trusted certificate authority certificates
Certificate subject: https://github.com/chainguard-images/images/.github/workflows/release.yaml@refs/heads/main
Certificate issuer URL: https://token.actions.githubusercontent.com
GitHub Workflow Trigger: schedule
GitHub Workflow SHA: f01afb51b92774514981ddd7de567b987030b225
GitHub Workflow Name: .github/workflows/release.yaml
GitHub Workflow Repository: chainguard-images/images
GitHub Workflow Ref: refs/heads/main
Digging a bit more into the JSON file it returns, we can find details about the build of this image such as licensing of the data, what was signed, etc. The full JSON file it returns is archived here and the base64 encoded data from the signature authority is here .
Staying in GitHub only
Staying within GitHub makes life a little easier within the user interface, but otherwise isn’t much different. There’s a pretty table to see (some of) the data stored in that JSON file … and that’s more or less it. Here’s an example of the table GUI and the matching JSON file . The directions are a little different to use it and verify it over the CLI too.
For my small open-source project, I added the following to the workflow file that builds the image:
1
2
3
4
5
6
7

- name: Attest the build
  uses: actions/attest-build-provenance@v2
  id: attest
  with:
    subject-name: ghcr.io/some-natalie/jekyll-in-a-can
    subject-digest: ${{ steps.build-and-push.outputs.digest }}
    push-to-registry: true
Then to verify it, you have to either rely on the gh CLI (easy) or use some directions on the Sigstore blog to verify it instead. Either way, you’ll have the same ability to script policies based on what it returns - an exit code, other data, etc.
1
2
3
4
5
6
7
8

ᐅ gh attestation verify oci://ghcr.io/some-natalie/jekyll-in-a-can:latest --repo some-natalie/jekyll-in-a-can
Loaded digest sha256:f116b788361c98d3222d44db77bd5d66cd37f96b46a201cd1a8b7bf212ea9337 for oci://ghcr.io/some-natalie/jekyll-in-a-can:latest
Loaded 1 attestation from GitHub API
✓ Verification succeeded!

sha256:f116b788361c98d3222d44db77bd5d66cd37f96b46a201cd1a8b7bf212ea9337 was attested by:
REPO                          PREDICATE_TYPE                  WORKFLOW
some-natalie/jekyll-in-a-can  https://slsa.dev/provenance/v1  .github/workflows/build.yml@refs/heads/main
The attestation is then stored as an additional unknown/unknown architecture to the build.
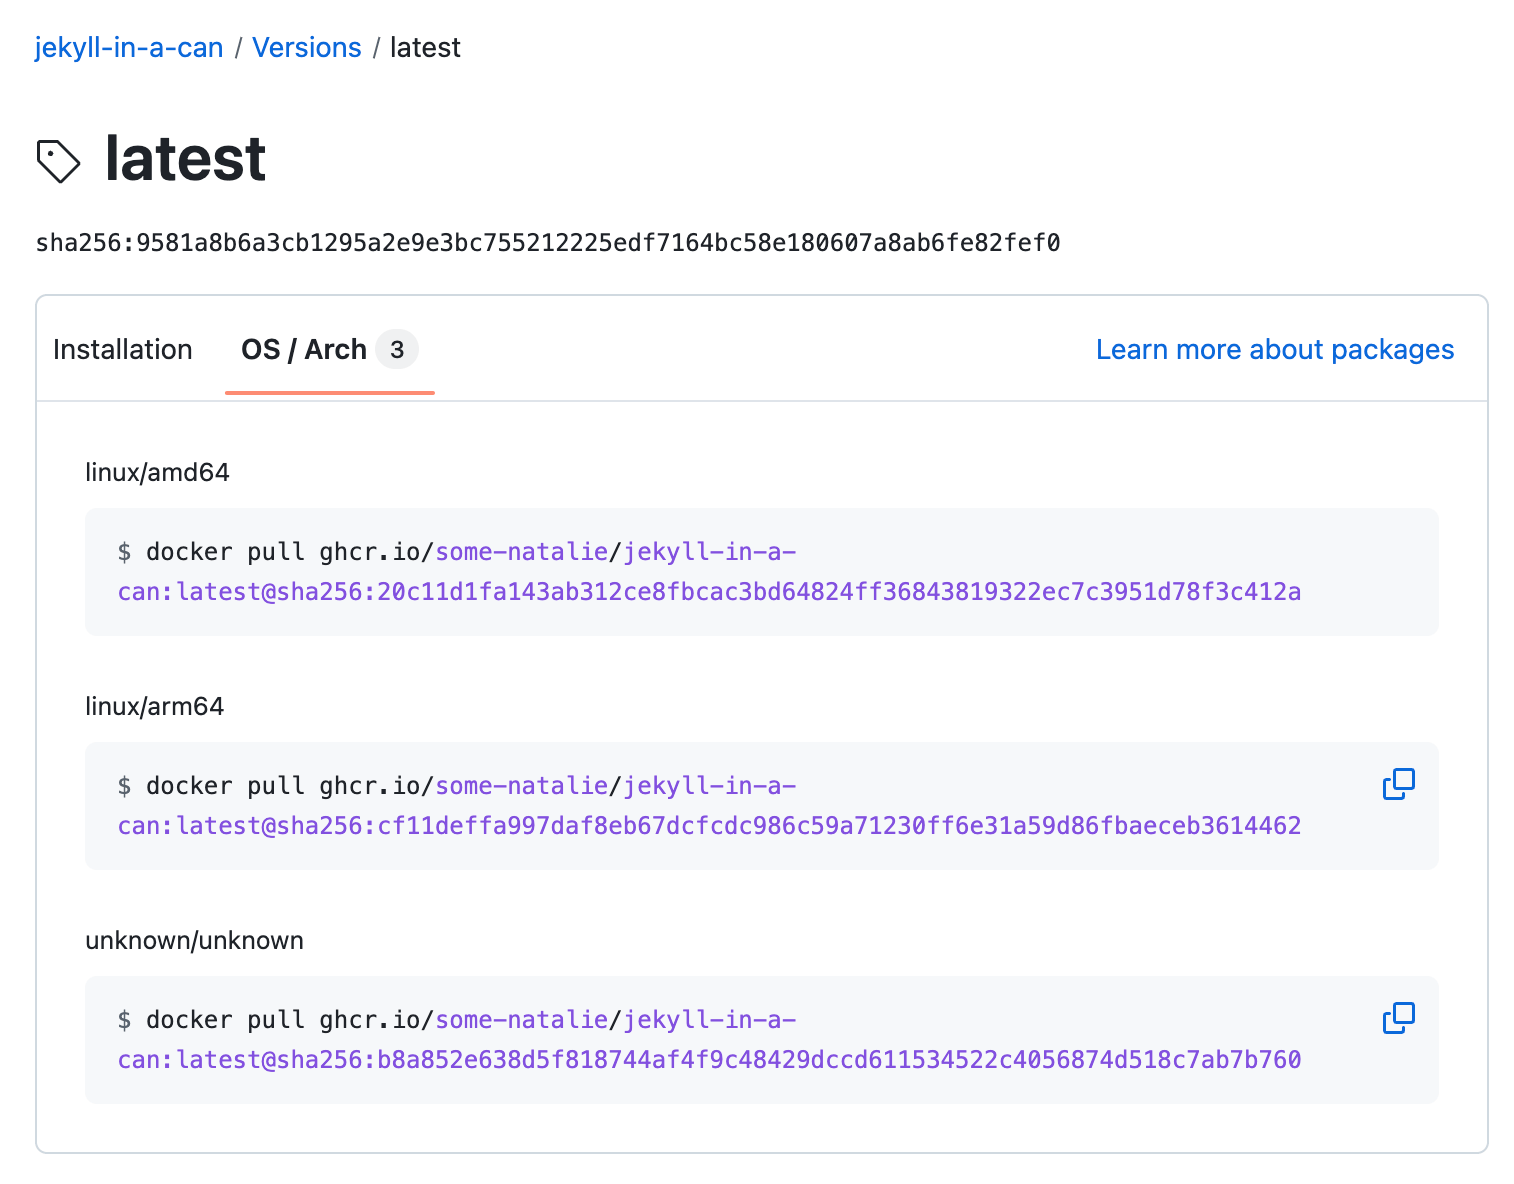
 an example of the attestation stored alongside each architecture of the finished artifact tag
Why is this important for CI runners?
These steps are important for all the software you run and build, but it’s doubly important for CI runners. These are the systems that build the rest of your software. In every CI system threat model, it’s a good point to establish persistence or to move laterally, as these systems tend to have extra privileges or network access. They also are typically co-tenanted in an enterprise setting, meaning there’s a “shared services” team that runs them. They also store and retrieve credentials for private registries or other services to deploy your software. Build systems are an amazingly high-value target to compromise.
Conclusion
Signing finished artifacts has been an established control across many cybersecurity frameworks for years. It allows you to prove that nothing has been tampered with since “leaving the kitchen”, but doesn’t provide any assurances before that point.
Attesting builds gives more information about what happened “in the kitchen” where that build took place to definitively link a finished software build to the process that built it. What goes into that attestation is (somewhat) up to the systems you’re using, but having that link is the critical leap between writing code and deploying it.2
Both of these are easy to misunderstand and far simpler to set up than feared. They each provide different, yet valuable, data to have when developing software in a regulated environment.
Footnotes
-
This book is why there are meat inspectors in slaughterhouses. Despite being primarily about economic struggles of immigrants at the turn of the 20th century, the change enacted instead was on the consumer safety around the products of their labor. Summary on Wikipedia or read the entire novel for free on Project Gutenberg . ↩
-
This was that “next jump” after the one between human and code that I cut from my talk on surviving your first code audit earlier this year. Perhaps I’ll expand it for another year’s talk, but explaining what this even is and why it’s valuable is a bigger part of my day job lately. ↩