Ball pit
Ball pit
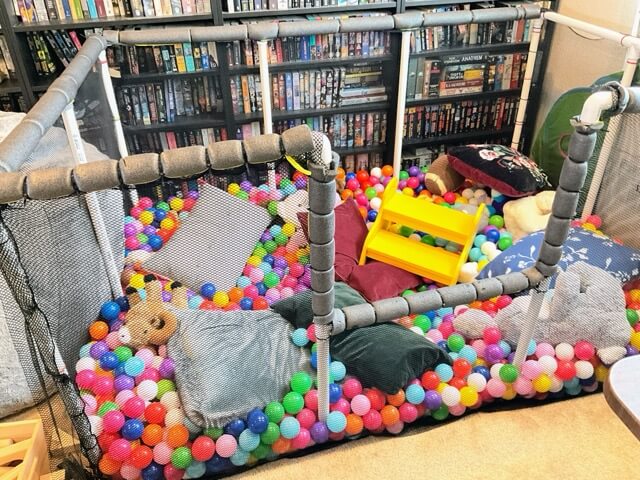
Shortly after moving into our home in 2020, we built a PVC ball pit (ostensibly) for the children. It’s 6’ by 4’ and full of thousands of crush-proof plastic balls. A bunch of stuffed animals have found their way into it too. It was cheap and easy to build. For the sustained kiddo entertainment throughout COVID closures and snow days while two grown-ups attempt to work, it’s been one of the best toys they have.
The kids love it.
I take meetings while sitting inside it, even if the kids aren’t home … 😇
Materials
Hardware store
- 1 inch Schedule 40 PVC Pipe
- 10 ft lengths (x4)
- 2 ft lengths (x20) - precut saves time, feel free to cut it yourself
- 1 inch 90 degree elbow PVC angle (x2)
- 1 inch tee-joint PVC (x12)
- Foam pipe insulation - 6 ft lengths (x4) (optional)
- 8-inch cable ties (x1000)
Fabric store
- 6 yards fabric mesh (sometimes called cargo netting or utility mesh)
Online
- 1 inch 3-way corner PVC elbow (x8)
- 2000 (or so) 3-inch ball pit balls
To assemble
- Wire cutters make quick work of the little bits of zip tie at the end.
- Something to cut the PVC yourself. A ratcheting PVC pipe cutter is literally made for exactly this task, but I hesitate to recommend buying a tool for a single project. A mitre box and handsaw works well. You may need to sand the edges around the cut a little bit to smooth it some. I used big branch loppers and it worked fine.
- PVC primer and cement (optional) - more on this in the notes.
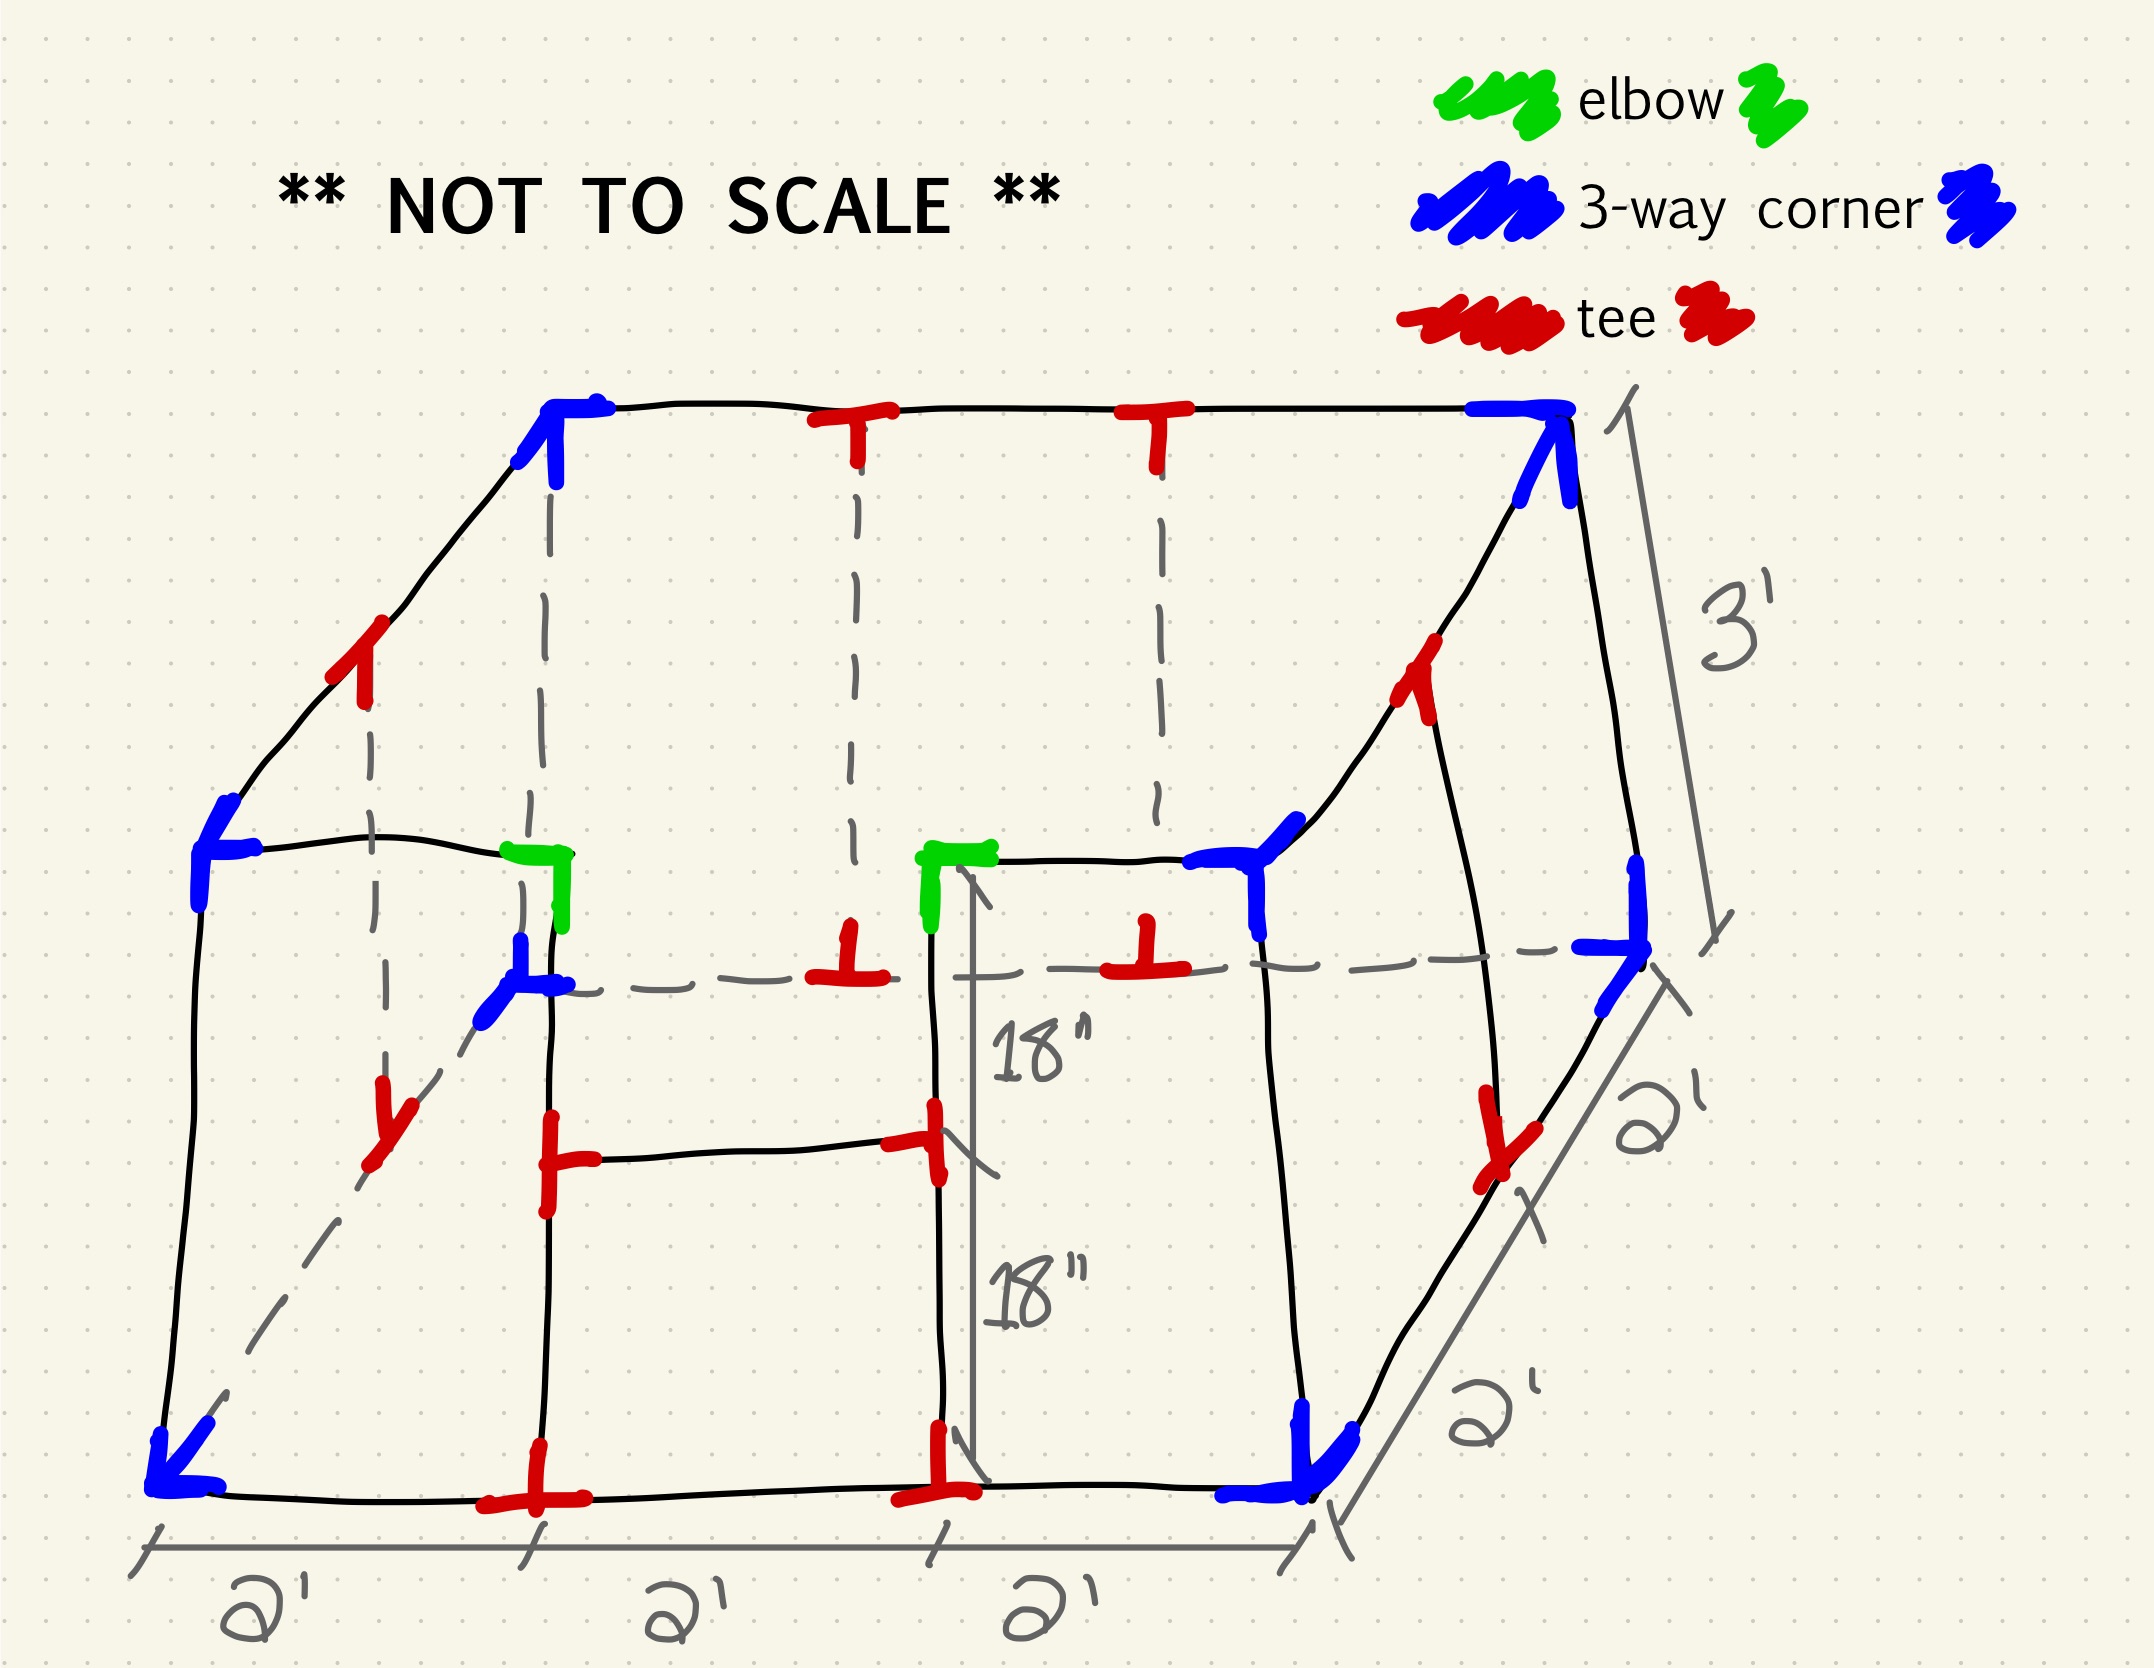
PVC cut list
- 8 x 36 inches
- 20 x 24 inches
- 4 x 18 inches
Diagram
Assembly
- Dry fit (or cement) PVC pipe together. If you’re cementing it, consider leaving a few joints dry-fit to take it apart later.
- Wrap in mesh and zip tie in place. First, wrap along the 3’x4’ sides and the bottom in one big cut. Then do the back 3’x6’ section. Use the remainders to finish the front section.
- Edge the top and entrance with pipe foam, then zip tie in place.
- Fill with balls!!!! 🎉
Notes
- The balls are the most expensive part. Do not get balls that have little holes in them to get gross. Get ball pit balls because they stay cleaner and can go through the washing machine.
- The 3-way corner PVC thing is not used for plumbing or conduit. It’s only for folks making furniture and other widgets out of PVC, so it likely isn’t at the hardware store.
- Each fitting adds an inch or so to every dimension it’s on. You may choose to take an inch or two off of the corners around the entrance so it’s more square. Kids don’t seem to mind it either way.
- It had been in place for about 3 years without any problems assembled dry-fit. I can move it to vacuum underneath it. Sometimes I need to pop a piece back into an elbow by the entrance and that’s it. As the kids got bigger (and rougher), I did eventually PVC cement it together and left two joints along the 4’ sections dry-fit. This means it’ll come apart in 2 pieces if/when we decide to take it apart.
- I will be moving it to another part of the house in a few months. When I do, I’m going to not use zip ties and instead use a yarn needle and some spare yarn to hold the mesh fabric onto the frame. Some of the zip ties have worked loose and needed to be replaced. The cotton yarn works wonderfully and doesn’t scratch anyone.
- On reassembly, I left out the pipe insulation. It didn’t seem to do anything for anyone apart from get a little sticky over the years.
- Stuffed animals and those big floor pillows for reading make relaxing additions. 🧸
- If it’s on top of hardwood flooring, use some foam mats underneath to protect it from scratches.
Resources
This post is licensed under
CC BY-NC-SA 4.0
by the author.